
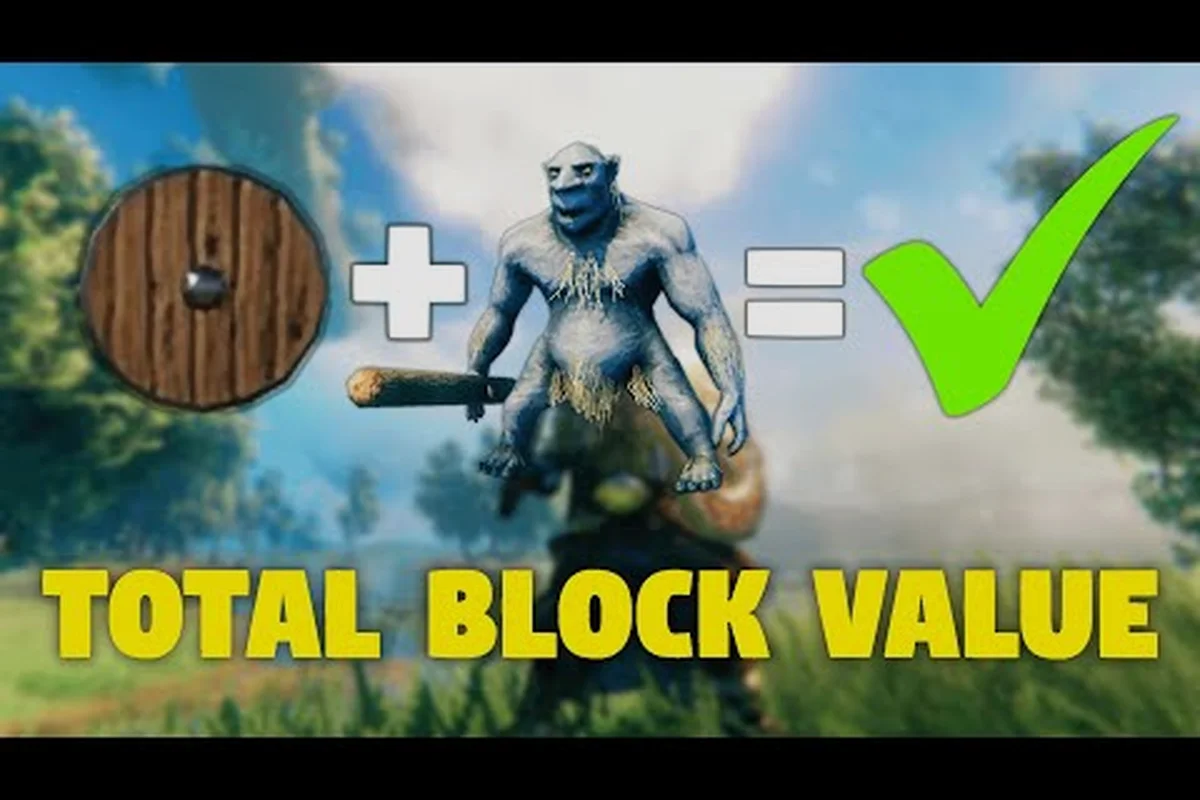
The Valheim stagger mechanic lets you freeze any enemy in place for a free punish, and the only thing standing between a chaotic Plains raid and a clean stunlock is timing your parry with the right buckler. When you understand how stagger fills, drains, and resets, even the meanest Fuling Berserker or Deathsquito becomes a target you can dictate. This guide breaks down the numbers, the gear, and the rhythm that turn a defensive parry into the opening for a backstab, a heavy combo, or a full team wipe.
How the Valheim Stagger Mechanic Works
Stagger in Valheim is a hidden value tied to every creature. Each hit you land, and each hit you block, pushes the meter a small amount based on the damage dealt versus the target's resistance. Once the meter fills, the target enters a brief "stun" state where it cannot attack, block, or move, and takes a bonus multiplier on the next incoming hit. According to the Valheim wiki on Fandom, stagger builds up when you block or parry and when you deal heavy damage in a short window, which is why bursty weapons and timed parries feel so rewarding.
The stagger meter is separate from health, and it does not persist between fights. Enemies reset the bar the moment they aggro a different player or after a short idle period. That single fact changes how the entire combat loop plays out, because it rewards aggressive momentum over passive poking. A lone archer kiting a Troll from across the meadow will rarely stagger it, while a melee player landing three consecutive axe hits in under a second almost always flips the monster into a stun state.
Stagger Build Sources
Every action that interacts with the enemy has a stagger contribution. Attacks contribute based on the weapon's base damage, modified by the specific hit zone. Headshots with a heavy two-handed weapon dump a huge chunk of stagger on top of the bonus headshot damage, while body shots with a small dagger chip away at the bar at a slower rate. Blocking contributes too, with shields adding stagger based on the blocked damage and the shield's block force stat. The parry action, performed with a buckler right before the hit lands, is the single highest stagger-per-stamina source in the game.
| Stagger Source | Stagger Contribution | Stamina Cost | Notes |
|---|---|---|---|
| Heavy two-handed weapon headshot | Very High | 20 | Best stagger-per-hit in the game |
| One-handed axe body shot | Medium | 10 | Reliable filler between parries |
| Buckler parry (timed) | Very High | 10 | Doubles as block and stagger trigger |
| Blocking with tower shield | Low | 0 (passive) | Better for survival than stagger |
| Atgeir secondary attack | High | 15 | Wide sweep, strong stagger window |
| Bow fully drawn shot | Negligible | Varies | Ranged stagger is minimal in early biomes |
Stagger Thresholds by Enemy Tier
Not every enemy staggers at the same rate. Greylings and Necks fill quickly, while Bonemass and other biome bosses resist stagger for most of the fight until the bar is nearly full. According to community data, low-tier enemies typically need two parries or a single heavy headshot to stagger, while Fulings and Seeker soldiers need a chained parry-into-heavy combo to flip. Bosses follow a similar curve but require patience because their stagger bar is far larger.
| Enemy | Approx. Stagger Hits to Stun | Best Method |
|---|---|---|
| Greyling / Greydwarf | 1 heavy hit | Atgeir secondary attack |
| Skeleton (Meadows) | 1 parry + 1 follow-up | Buckler parry then slash |
| Troll | 3-4 parries or 2 heavy headshots | Spear + buckler chain |
| Fuling Berserker | 2 parries + heavy combo | Buckler into backstab |
| Deathsquito | 1 parry (lance) | Spear stab as it dives |
| Bonemass (boss) | 8+ parries over the fight | Buckler parry on melee swipes |
Valheim Parry Timing and the Buckler Window
Parrying is the most precise defensive action in the game, and it lives or dies on a tight window. When you raise a buckler and the parry animation completes, the next incoming hit is fully negated and converted into a stagger trigger. According to the official Valheim page on Steam, a successful parry both blocks the attack and stuns the attacker for a short window, opening them up for a free punish. The catch is that the active parry frames are only about 0.4 seconds long, so reacting to the wind-up rather than the actual swing is critical.
Parry Frames by Shield Type
Not all shields share the same parry timing. The buckler has the shortest parry window but the lowest stamina cost and the fastest recovery, which is why it dominates dedicated parry builds. Tower shields have a parry window too, but the animation is so slow that the practical parry window barely registers, and they recover much more slowly. Round shields sit in the middle and work as a hybrid for newer players who have not yet built the muscle memory.
| Shield | Parry Window | Parry Stamina | Recovery Time | Best Use |
|---|---|---|---|---|
| Wood Buckler | ~0.4 s | 10 | 0.6 s | Early game parry training |
| Bronze Buckler | ~0.4 s | 10 | 0.6 s | Black Forest parry specialty |
| Iron Buckler | ~0.4 s | 10 | 0.6 s | Swamp biome parrying |
| Banded Shield | ~0.3 s | 15 | 0.9 s | Hybrid block/parry |
| Silver Shield | ~0.3 s | 15 | 0.9 s | Mountain biome hybrid |
| Black Metal Shield | ~0.25 s | 20 | 1.1 s | Plains parry option |
| Carapace Shield | ~0.25 s | 20 | 1.1 s | Mistlands parry option |
| Bone Tower Shield | None | N/A | N/A | Block-only, no parry |
| Iron Tower Shield | None | N/A | N/A | Block-only, high force |
Reading the Wind-Up
The real parry skill is not in the shield slot — it is in reading animations. Every enemy telegraphs its swing with a wind-up, and that wind-up length matches the parry window of the buckler almost exactly. When a Fuling raises its stick, when a Troll winds back its log, or when a Deathsquito tilts forward for a dive, the moment the weapon reaches the apex of the wind-up is when you tap the parry key. Players who learn to watch the weapon rather than the enemy body report nearly perfect parry rates after a single dedicated session.
The most common mistake is parrying too early, which drops the shield and leaves the player wide open. A parry input before the wind-up completes simply performs a standard block, which still reduces damage but contributes very little stagger. The 0.4-second window sounds generous on paper, but in practice it feels like a single frame because the player is also tracking the enemy's position, their own stamina, and the surrounding terrain. This is exactly why valheim armor and movement speed are the secondary priorities in a parry build — the faster you can reposition between swings, the more chances you get to find that perfect apex.
Gear Loadout for a Stagger-Focused Build
A stagger build is more than just a buckler and a heavy weapon. The full loadout determines how often you can parry, how fast you recover, and how punishing the follow-up combo can be. Armor influences stamina regeneration, movement speed, and noise, while capes grant the unique dodge roll that lets you reset the rhythm of a fight entirely. That tier and material trade-off carries into specific recommendations, so if you want a curated shortlist of the strongest options for each stage of the game, our Valheim Best Armor guide breaks down exactly which sets to chase and when.
Armor Sets and Stagger Playstyle
Armor choice is not a one-size-fits-all decision in stagger play. Light armor lets you reposition quickly and chain more parries per minute, but it also means a single mistimed parry costs a much larger chunk of health. Heavy armor absorbs mistakes, but the stamina regeneration penalty means you can only parry a few times before you are forced to retreat and wait. Most experienced parry players run a medium-tier set in the relevant biome, then swap to a heavier set once they trust their timing.
| Set | Weight | Stamina Regen | Parry Frequency | Mistake Tolerance |
|---|---|---|---|---|
| Troll Set | Light | Fast | 6-8 parries/min | Low |
| Root Set | Medium | Medium | 4-6 parries/min | Medium |
| Bronze Set | Medium | Medium | 4-6 parries/min | Medium |
| Iron Set | Medium | Medium | 4-6 parries/min | Medium |
| Wolf Set | Medium-Heavy | Slow | 3-4 parries/min | High |
| Padded Set | Heavy | Slow | 2-3 parries/min | Very High |
| Carapace Set | Heavy | Slow | 2-3 parries/min | Very High |
Players who lean on valheim troll set bonus for fast stamina regen get noticeably more parries per minute, while a Padded or Carapace set provides the survivability needed when you are still learning the apex window. Pairing the valheim best plains armor or the Mistlands-tier equivalents with a buckler is the typical endgame configuration, and the armor weight is offset by the fact that you simply take fewer hits once your parry rate climbs above 70%.
Capes, Movement, and the Dodge Reset
Capes are the most underrated piece of a stagger build because they enable the dodge roll. Dodging does not trigger stagger, but it does let you cancel a recovery animation and reposition instantly, which means you can bait out a swing, parry the follow-up, and dodge away from the recovery sweep in a single fluid sequence. Each biome adds a cape variant, and the upgraded versions reduce the stamina cost of the roll so you can chain more dodges per stamina bar.
-
Troll Cape (Black Forest): First dodge, 20 stamina — baseline for parry players
-
Feather Cape (Plains): 15 stamina — the staple for endgame parry duels
-
Lox Cape (Plains alt): Damage reduction while dodging — best for learning
-
Wolf Cape (Mountain): Cold resistance + dodge — useful in frost biomes
-
Ashen Cape (Ashlands): Fire resistance + dodge — boss prep staple
The combination of a Feather Cape dodge, an Iron Buckler parry, and a heavy two-handed follow-up is the most consistent stagger sequence in the late game, and it works against every humanoid enemy from Fulings to Seekers without changing gear.
Stunlock Combos and Punish Windows
Staggering an enemy is not the goal — it is the setup. The stagger window is roughly 2 to 3 seconds for most humanoid enemies, and during that window the target cannot block, dodge, or counter. A well-built combo converts that 2-second window into 200+ damage and, in many cases, a chain stagger that locks the enemy into a permanent stun state for the rest of the fight.
Standard Parry-Punish Combo
The most reliable combo is a parry into a single heavy attack. With a stagbreaker or a two-handed axe, one fully charged hit into a staggered Fuling typically removes 60-80% of its health, and a second chained stagger finishes the fight before it can recover. The timing is simple: parry, wait 0.1 seconds for the stagger animation to start, then charge a heavy attack. Releasing the heavy attack too early whiffs because the enemy is still in its own stun animation and has not yet entered the punishable pose.
For Daggers and other fast weapons, the combo instead chains three to four quick stabs into the staggered target. Dagger backstabs during the stagger window multiply damage by 3x, which is why a backstab-focused parry build is one of the strongest single-target setups in the game. Reported by players, a single stagger window against a Seeker soldier can deliver a full-health deletion with the right dagger timing.
Stunlock Loops
Stunlocking is the act of staggering an enemy so quickly that it never gets a chance to recover its stagger bar. The classic loop is parry → heavy → parry → heavy, where the second parry happens before the enemy has fully stood up from the first stagger. This works reliably on Greylings, Skeletons, and lower-tier Fulings, but it breaks down on enemies with very large stagger bars because the second parry input is consumed by the block window before the stagger bar resets.
| Combo | Stagger Output | Stamina Cost | Best Against |
|---|---|---|---|
| Parry → Heavy 2H | 1 stagger trigger + heavy damage | 30 | Fuling, Seeker |
| Parry → 3x Dagger stab | 1 stagger + 3x backstab bonus | 30 | Fuling, Berserker |
| Parry → Atgeir secondary | 1 stagger + wide sweep | 35 | Greyling, Skeleton group |
| Parry → Dodge → Parry | 2 staggers in 3s | 20 | Troll, Fuling Berserker |
| Heavy 2H → Heavy 2H | 2 staggers in 4s | 40 | Bonemass phase 2 |
Stunlocking shines in group fights because the stagger window lets you reposition for the next target. After staggering a Fuling, the typical move is to immediately turn and parry the second Fuling that was closing in, which restarts the loop with a fresh enemy. According to community data, coordinated teams that chain stagger windows this way can clear Plains villages twice as fast as a team that relies on raw damage.
Boss Stagger Strategy
Bosses follow the same stagger rules but on a much larger scale. Bonemass, for example, has a stagger bar roughly 8x the size of a Troll, and you cannot break it with a single parry. The strategy is instead to chain parries on its melee swipes, build stagger over the course of the fight, and burst the bar during a vulnerable phase. Bonemass is most vulnerable right after the mist attack, when the boss rears up for a heavy slam — that slam is one of the easier parries in the game and it dumps a large stagger chunk.
The Moder dragon uses a fire breath sweep that is nearly impossible to parry because the wind-up is so long, but the follow-up claw swipes are very telegraphed and very parryable. Yagluth, the Ashlands boss, has a fast melee combo with a short parry window, so experienced players recommend the Black Metal Buckler or a Carapace Buckler for that fight because both offer the shortest parry animation.
Advanced Stagger Tactics and Matchups
Once the basic parry rhythm is locked in, the next level of stagger play is about matchup knowledge. Some enemies are easier to stagger than others, and a few have hidden stagger rules that completely change the fight. The Mistlands Seeker line, for example, has a stagger window that resets if you attack its armored back, so positioning around the creature is just as important as timing the parry.
Stagger-Resistant Enemies
A small number of enemies ignore stagger almost entirely. Bonemass has a flat stagger reduction during phase 2, and the Mistlands Gjall cannot be staggered by any single player — only coordinated parries from multiple teammates build its bar. The Ashlands adds new stagger-resistant creatures that force the team to play around the parry rather than rely on it. Knowing which enemies resist stagger saves a lot of wasted parry stamina in a long raid.
| Enemy | Stagger Resistance | Recommended Response |
|---|---|---|
| Bonemass (Phase 2) | 50% reduction | Stack parries, burst during mist recovery |
| Gjall | Very high | Group parry chain, not solo |
| Seeker Brute | Medium | Focus on the unarmored head |
| Fuling Berserker | Low | Standard parry-heavy combo |
| Deathsquito | None | One spear thrust staggers fully |
| Lox | Medium | Two staggers needed, then heavy |
Animation Canceling and Parry Chains
Animation canceling is the secret technique that separates good parry players from great ones. When you parry, the recovery animation is roughly 0.6 seconds, and the buckler is locked out for that full window. The trick is to start a dodge input during the recovery, which cancels the recovery into the dodge roll, and then immediately raise the buckler again for the next parry. This means you can chain two parries in under 1.5 seconds rather than the standard 2 seconds, which is the difference between a normal stagger fight and a true stunlock.
The animation-cancel chain is also the only reliable way to parry fast-attacking enemies like Fuling Berserkers, who throw three swings in under 2 seconds. The sequence is parry the first swing, dodge-cancel the recovery, parry the second swing, dodge-cancel again, and then heavy-attack the third swing. Reported by players, this chain works against every humanoid enemy in the game and is the foundation of every high-tier parry build.
Common Mistakes to Avoid
The stagger mechanic punishes sloppy play, and a few common mistakes will eat through your health bar faster than the enemy can. Parrying too early is the most common one, because players instinctively react to the wind-up rather than the apex of the swing. The second most common is parrying while out of stamina, which turns a parry into a stagger-self effect and leaves you wide open for the next hit. The third is attacking a staggered target from the front, which not only deals reduced damage but also lets the enemy recover faster than a backstab would.
-
Parrying too early → performs a normal block, no stagger trigger
-
Parrying while exhausted → applies stagger to you, not the enemy
-
Front-attacking a staggered target → reduced damage, faster recovery
-
Ignoring stamina regen food → limits parries per fight
-
Standing still between parries → easy target for ranged enemies
-
Using a tower shield for parrying → no parry window, wastes stamina
Frequently Asked Questions
What is the Valheim stagger mechanic?
The Valheim stagger mechanic is a hidden value on every enemy that fills as you block, parry, or land heavy hits. When the bar fills, the target enters a brief stun state where it cannot act and takes bonus damage. Parry windows and heavy headshots are the fastest ways to fill the bar, which is why bucklers and two-handed weapons dominate stagger-focused builds.
How does the Valheim parry work with a buckler?
When you raise a buckler and the parry animation completes, the next incoming hit is fully negated and converted into a stagger trigger. The active parry window is about 0.4 seconds and costs 10 stamina, so timing it to the apex of the enemy's wind-up is critical. A successful parry stuns the attacker, opens up a 2-3 second punish window, and is the single best stagger source in the game.
Which Valheim shields can parry?
Every shield that is not a tower shield can parry in the Valheim stagger mechanic. Bucklers have the shortest but most reliable parry window, round shields sit in the middle, and tower shields cannot parry at all. The Iron Buckler, Black Metal Buckler, and Carapace Buckler are the most-used parry shields at their respective biomes, and they all share the same 0.4 second parry animation.
Do Valheim capes affect parrying or stagger?
Valheim capes do not directly affect stagger, but they enable the dodge roll, which lets you animation-cancel out of parry recovery and chain parries faster. The Feather Cape and the Lox Cape are the most popular choices for parry players, and upgrading the cape reduces the stamina cost of each dodge so you can chain more parries per stamina bar. The cape is therefore a core part of every advanced stagger build.
Can you stunlock bosses with the Valheim stagger mechanic?
Yes, but the stagger bar on bosses is much larger than on regular enemies, so solo players need to chain parries over the course of the entire fight. Bonemass, Moder, and Yagluth can all be stunlocked during vulnerable phases, and a coordinated team can keep a boss in a permanent stagger state for short windows. The parry timing on boss attacks is more forgiving than on humanoid enemies, which makes boss stagger fights a great way to practice the rhythm before taking it into Plains and Mistlands raids.