Iron is the resource that separates a base with a bronze workbench from a base ready for the Mountains, and every Viking eventually asks the same question: how to get iron in Valheim without losing it to a teleport accident or a draugr ambush. The answer is found in the Swamp biome's Sunken Crypts, where mud piles hide scrap iron that must be carried, smelted, and refined before it becomes the iron bars used for iron tools, iron weapons, and iron-tier armor. Gathering mud and scrap in those crypts is far more efficient once you have a steady supply of stone for a sturdy pickaxe, so see our guide to getting stone in Valheim before your first trip into the Sunken Crypts to avoid spending half the run mining boulders with a flimsy antler pick.
Understanding Iron as a Mid-Game Tier Resource
Iron occupies a specific slot in the metal progression that begins with copper and tin and eventually reaches black metal and flametal. According to the official Valheim page on Steam, iron is mined as scrap iron from mud piles inside Sunken Crypts and muddy scrap piles found in the Swamp, then smelted into iron bars at a Smelter using coal. This single sentence captures the entire production chain: explore, mine, smelt, craft.
Unlike copper and tin, which drop as raw ore nodes from surface boulders, scrap iron only appears in two locations: the mud piles scattered across Sunken Crypt dungeon rooms and the muddy scrap piles hidden under the Swamp's surface water. Both sources require venturing into one of the more dangerous mid-game biomes, which is why preparation matters before the first crypt run.
Why Iron Cannot Be Teleported
One rule shapes every iron farming decision: scrap iron does not teleport through portals. Placing any quantity of scrap iron into a portal and walking through it destroys the ore, because the metal is considered too heavy for Odin to transport. Smelted iron bars are exempt from this restriction and move freely through portals, which is why experienced players always run a smelter on the Swamp perimeter or ferry bars back through a cart.
This teleport restriction is the single most common cause of "I lost all my iron" posts on community forums. The fix is procedural: build a Smelter (and ideally a Charcoal Kiln) at or near the crypt, smelt on-site, and only transport the finished bars. The same restriction applies to raw copper, tin, silver ore, black metal, and flametal — every metal in the game is heavier than portal-space allows, with bars being the teleportable end product.
Iron's Role in the Metal Progression
Iron sits between bronze and silver on the crafting tier ladder, and it gates most of the gear used to clear the Mountains. A useful mental model is that bronze gets you to the Swamp, iron gets you out of the Swamp and through the Mountains, and silver/black metal handle the Plains.
| Metal | Source Biome | Raw Form | Smelt Output | Teleport Rule |
|---|---|---|---|---|
| Copper | Black Forest | Copper ore | Copper bars | Ore cannot teleport |
| Tin | Black Forest | Tin ore | Tin bars | Ore cannot teleport |
| Bronze | Crafted at Forge | Copper + Tin | N/A (alloy) | Bars teleport freely |
| Iron | Swamp | Scrap iron (mud piles) | Iron bars | Ore cannot teleport |
| Silver | Mountains | Silver ore (frosty veins) | Silver bars | Ore cannot teleport |
| Black Metal | Plains | Black metal scraps | Black metal bars | Scaps cannot teleport |
| Flametal | Ashlands | Flametal ore | Flametal bars | Ore cannot teleport |
This table also answers a common follow-up: valheim how to get bronze follows the same logic — bronze is not mined directly but crafted at a Forge by combining copper and tin, both of which must be smelted from Black Forest ore. Players who skip ahead to iron without stockpiling bronze risk being unable to forge an iron-tier pickaxe in the first place, because the Forge upgrade chain requires bronze nails and a Bronze Anvil.
In Valheim, iron is one of the most valuable mid-game resources, primarily found in the Swamp biome after defeating the second boss, the Elder, and it's required to craft stronger weapons, armor, and tools as you progress toward the Swamp's toughest challenges, according to the game's official Steam store page for Valheim.
Pre-Run Preparation: Gear, Food, and the Swamp Itinerary
A safe iron run starts long before the first crypt door opens. The Swamp is hostile during the day and worse at night, when leeches surface, draugr patrols thicken, and the infamous draugr elite archers one-shot unarmored Vikings. Bringing bronze-tier armor at minimum, a fully upgraded Bronze Buckler or Banded Shield, and a rested bonus of at least one comfort level keeps most ambushes survivable.
The Mandatory Loadout Checklist
Before crossing the Swamp border, confirm the following:
-
Bronze or iron-tier armor with the helmet, chest, and legs all upgraded to level 2 or higher
-
Bronze Buckler for parrying, or a Tower Shield if the player is new to timing blocks
-
Bronze Mace or Bronze Atgeir as primary weapons (the mace is the best-in-slot pickaxe substitute for crypt mobs)
-
Stagbreaker or Iron Sledge in reserve for draugr crowds
-
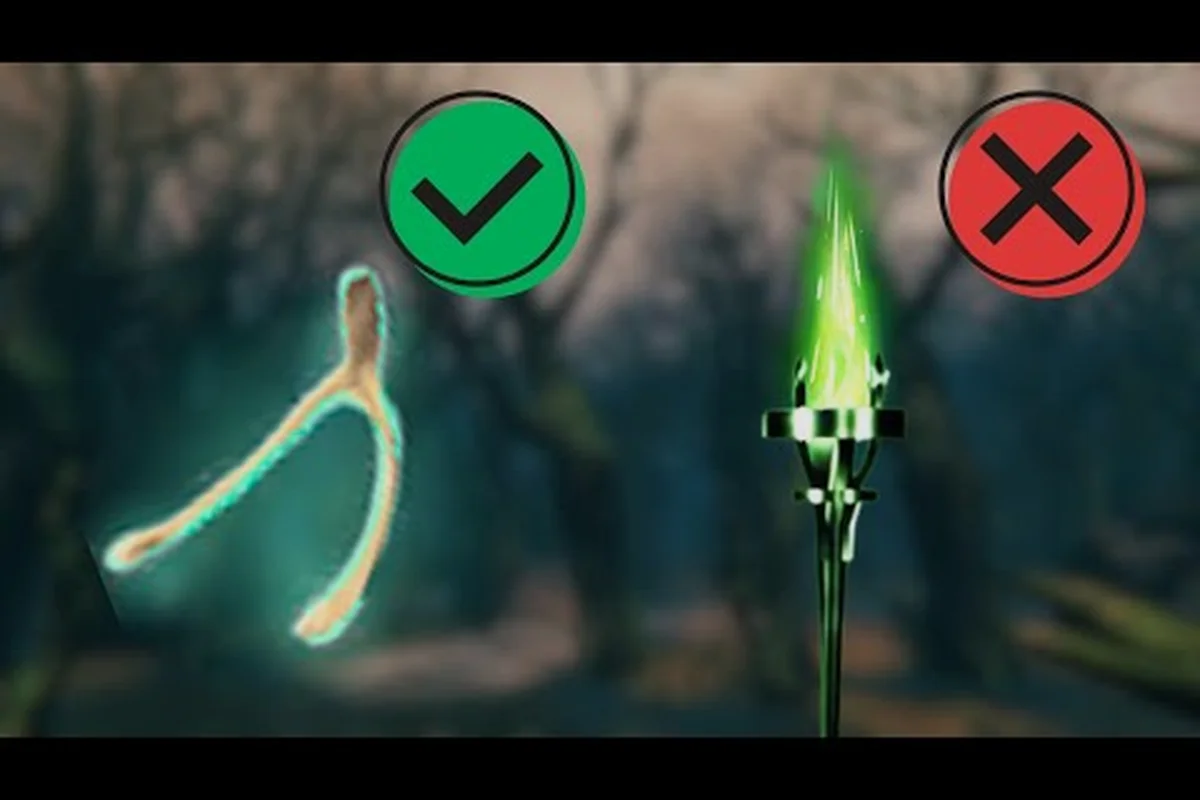
Wishbone to detect buried muddy scrap piles once the Swamp boss Bonemass is defeated
-
Portal materials (20 wood, 10 greydwarf eyes, 2 surtling cores) to set up a forward base
-
Wood, stone, and a workbench to repair gear and build a forward smelter
The Wishbone is essential for surface scrap. After defeating Bonemass and equipping the Wishbone, the green pulse that detects silver in the Mountains also picks up muddy scrap piles hidden in the Swamp's shallow water. Without the Wishbone, surface scrap is invisible and only the crypt mud piles are accessible.
Food Stacking and Comfort
Stamina management is the single most common cause of failed crypt runs, because the Bronze Pickaxe (or Antler Pickaxe early on) drains stamina quickly on mud blocks. Stacking three foods that grant balanced health and stamina — cooked meat, carrot soup, and honey-based mead — gives roughly 100–120 HP and 80–100 stamina, which is the minimum survivable buffer against a leech or draugr surprise. A Medium Mead base built near the crypt door adds comfort and accelerates rested bonus regeneration between rooms.
Mining Scrap Iron Inside Sunken Crypts
Sunken Crypts are the dungeon variant of the Swamp, identifiable by their green-dungeon entrance torches and the drowned ruins jutting out of the marsh water. Each crypt contains 6–10 rooms connected by flooded corridors, and every room typically hides 3–6 mud piles along the walls and floor. Breaking these mud piles with a pickaxe yields scrap iron, sometimes alongside ancient bark, Withered Bones, and rare chain drops.
Step-by-Step Crypt Clear
The following routine minimizes risk while maximizing haul:
-
Step 1: Scout the entrance. Light the area with a standing torch, place a workbench at the doorway, and mark the portal route back home. If the crypt has multiple entrances, claim both with torches and a chest for bar storage.
-
Step 2: Clear room by room. Enter each side room, defeat the draugr and blobs that spawn, then sweep the mud piles with the pickaxe. Never mine while a draugr elite archer is line-of-sighting.
-
Step 3: Stack scrap in the room chest. Because the ore cannot teleport, drop each load into a reinforced chest at the crypt interior or at the perimeter smelter. Reinforced Chests hold 24 slots, which fits roughly 50–60 scrap iron.
-
Step 4: Smelt continuously. Feed coal and scrap iron into the Smelter, with a ratio of one coal to roughly three scrap iron. A single Smelter produces one iron bar every 30 seconds when fully fueled.
-
Step 5: Transport bars home. When the inventory is full of iron bars (max 60 per trip on foot, 150+ with a cart), ferry them through the portal or via a cart road.
Room-by-Room Hazard Map
| Room Type | Common Mobs | Mud Pile Density | Risk Level |
|---|---|---|---|
| Entry corridor | 1–2 draugr | Low (1–2 piles) | Low |
| Side crypt | Draugr + draugr elite + blob | High (4–6 piles) | High |
| Central hall | Draugr elite + leeches (water) | Medium (3–4 piles) | High |
| Treasure room | Wraith spawn (post-Bonemass) | Low (1–2 piles) | Very High |
| Outer swamp | Leeches + draugr (surface) | Hidden under water (Wishbone) | Medium |
Wraiths only appear inside crypts after the player has defeated Bonemass, which is the intended difficulty curve. Wraiths resist all non-spirit damage, so the only practical weapons against them are the Stagbreaker for stagger and the Iron Sledge once it is crafted. A common mistake is to enter a crypt before defeating Bonemass and being caught off-guard by a wraith that one-shots through bronze armor.
Smelting Scrap Iron Into Iron Bars
Smelting is the bottleneck of iron production. The smelter requires two inputs — scrap iron and coal — and produces iron bars at a 1:3 ratio (3 scrap → 1 bar) plus a small amount of coal consumed as fuel. Coal sources include surface deposits in the Swamp and Mountains, the Charcoal Kiln conversion of wood, and Surtling Cores harvested from Burial Chambers in the Black Forest.
Coal Supply Planning
| Coal Source | Yield per Action | Notes |
|---|---|---|
| Burial Chambers (Surtling Cores) | 5 coal per core | Most reliable mid-game source |
| Charcoal Kiln | 1 coal per 2 wood | Sustainable, slow (10 min/coal) |
| Swamp surface coal nodes | 8–12 coal per node | Limited but high-yield |
| Mountain coal nodes | 10–15 coal per node | Available after Mountains unlocked |
A typical iron run that fills 6 chests of scrap (around 250–300 ore) consumes about 80–100 coal, which is roughly one full run of Burial Chambers or a single afternoon of Kiln cycling. Many players build a small coal farm near the forward smelter — a 2×2 Kiln array with a wood-chopping perimeter — to keep the smelter running unattended while the player clears crypt rooms.
The Bar-First Workflow
A reliable workflow is to smelt every 20 minutes of mining output, because scrap iron is heavy and the inventory fills quickly. The smelter queue holds up to 30 scrap at a time, which processes into 10 bars in roughly 5 minutes with full coal. Always smelt before exiting the crypt if a smelter has been built at the entrance, because attempting to transport scrap iron over land often ends with a drop in shallow Swamp water and a lost load. This is also why a forward portal should be placed at the smelter rather than at the crypt door — the portal becomes a one-way bar express while the crypt remains a dangerous mining zone.
Common Mistakes and How to Avoid Them
Even experienced Vikings repeat a handful of avoidable errors during their first iron runs. The following table maps the mistake to the fix, and several of these issues intersect with the broader metal progression — for example, mishandling iron frequently mirrors how players mishandle valheim how to get silver in the Mountains, where the same teleport restriction applies.
| Mistake | Consequence | Fix |
|---|---|---|
| Putting scrap iron in a portal | Ore is destroyed on transit | Smelt first, transport bars only |
| Mining without a portal | Inventory overflow, lost ore | Always place a portal within crypt range |
| Forgetting the Wishbone | Surface muddy scrap piles are missed | Defeat Bonemass before serious Swamp mining |
| Bringing an Antler Pickaxe | Breaks every 4–5 mud piles | Upgrade to Bronze Pickaxe at minimum |
| Smelting at the main base | Massive walking trips | Build a forward smelter + Charcoal Kiln |
| Storing bars in wooden chests | Containers rot in the rain | Use Reinforced Chests at the forward base |
| Ignoring food stacking | Stamina crash mid-room | Run 3 foods, 100+ stamina, rested bonus on |
Iron in the Context of Late-Game Metals
The teleport and smelt rules that govern iron apply unchanged to every metal above it. Valheim how to get silver follows the same pattern: silver ore is mined from frosty veins in the Mountains using the Wishbone, smelted at the same smelter design, and only the bars can teleport. Valheim how to get blackmetal adds a Plains-specific twist: black metal is looted from Fuling camps and dropped as black metal scraps by Berserkers and Goblin Brutes, then smelted with coal into bars. Valheim how to get flametal mirrors silver in biome but doubles the danger — flametal is mined in the Ashlands from volcanic deposits guarded by lava-dwelling mobs, again smelted with coal.
This consistency is the design's strength. A player who masters the iron workflow — forward smelter, on-site coal, Wishbone for surface scrap, bar-only portal transit — has already learned the core loop that carries through silver, black metal, and flametal. The same loadout decisions (food, comfort, rested bonus) and the same risk patterns (high-tier mobs guarding ore) recur with increasing intensity.
When to Move On From Iron
Iron becomes a stepping stone the moment a fully upgraded Iron Pickaxe, Iron Atgeir, and Iron Armor set are in hand, because the next boss — Moder in the Mountains — requires iron-tier gear to survive the cold and the drake patrols. Players who linger in the Swamp burning through crypts should remember that 60 iron bars cover the entire iron-tier armor set, all required weapons, and several Forge upgrades, so the goal is volume, not endless mining. Once the forge is fully upgraded with the Forge Cooler (also requiring iron), the next step is the Mountains and the valheim how to get silver progression, which uses identical logistics at a higher elevation.
Frequently Asked Questions
Where do you find iron in Valheim?
Iron comes from two sources in the Swamp biome: scrap iron mined from mud piles inside Sunken Crypt dungeons, and surface muddy scrap piles hidden in shallow water and detected by the Wishbone after defeating Bonemass. Both sources yield the same scrap iron item, which is smelted into iron bars at a Smelter using coal as fuel. The crypt method is faster and more reliable, because the mud piles are visible inside the dungeon rooms, while the surface piles require the Wishbone's green pulse to locate.
Can you teleport iron ore in Valheim?
No. Scrap iron cannot be teleported through portals — placing any quantity of scrap iron into a portal and stepping through it destroys the ore, because the metal is treated as too heavy for portal transport. The fix is to smelt the scrap into iron bars at a forward Smelter near the Swamp, then move the bars through the portal. The same restriction applies to copper, tin, silver, black metal scraps, and flametal — only the smelted bar form is portal-safe.
How much iron do you need for a full iron set?
A complete iron-tier loadout uses roughly 60 iron bars for the helmet, chest, legs, and cape, plus another 10 bars for the iron pickaxe, iron axe, iron sledge, and forge upgrades. A single fully cleared Sunken Crypt yields 40–60 scrap iron, which smelts into 12–18 bars, so a typical player needs to clear 3–4 crypts to cover the entire iron tier plus forge coolers. Storing a buffer of 100+ bars is a common target for the transition into the Mountains, where the same bars help fund the silver and black metal upgrades.
What is the best way to mine iron without dying?
The safest pattern is to place a portal at the crypt entrance, build a forward Smelter and Charcoal Kiln nearby, and clear one room at a time with the door controlled by a workbench. Bringing bronze-tier armor upgraded to level 2, a Bronze Mace, a Buckler, and a stack of three foods keeps most ambushes survivable. Players who want to skip crypts entirely can wait for the Wishbone from Bonemass and surface-mine muddy scrap piles, which is slower but avoids draugr crowds and wraith spawns. This same preparation template is what experienced Vikings use when they later tackle valheim how to get blackmetal in the Plains, so learning it now pays dividends across every biome.